JOIN US FOR THE NEWEST LED LIGHTS IN MARKET
Enter your email below to get 10% off your first order

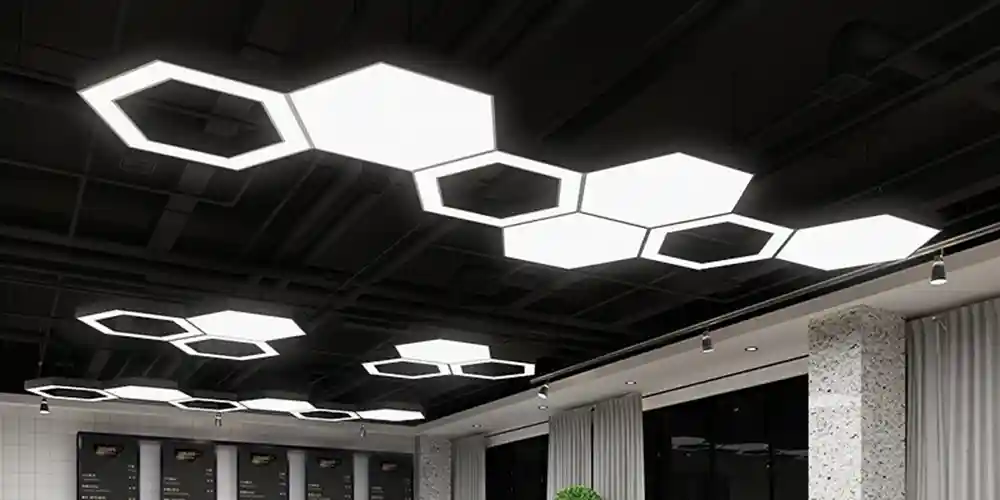
Today we will tell you how to install hexagon lights. The world of interior design is witnessing the rising popularity of hexagon lights. These stylish, technologically advanced light fixtures offer dynamic illumination and a distinct aesthetic appeal. For the do-it-yourself enthusiast, understanding how to install hexagon lights is paramount to achieving a seamless setup. Let’s explore this process, highlighting the necessary tools, pre-installation preparations, and post-installation practices.

Essential Tools for Installation
When you know how to install hexagon lights, installing hexagon lights does not require a large toolbox, but having the right essentials on hand can simplify the process. In most cases, you’ll need a cleaning cloth and a mild cleaning solution to prepare the surface. A pencil or a piece of chalk may also be necessary to sketch your desired layout onto the wall before mounting the lights. And don’t forget a good ladder to safely reach the desired height.
Understanding the Components of Hexagon Lights
Hexagon lights typically consist of LED panels shaped like hexagons, connectors to link the panels, a control unit that powers the lights, and adhesive strips or pads for mounting. By understanding these components, you set yourself up for a successful to know how to install hexagon lights process.
Pre-Installation: Design Planning and Surface Preparation
Before the actual installation, you need to undertake two crucial steps: design planning and surface preparation.
Hexagon lights offer the versatility to form various patterns. To harness this feature, plan your design carefully. Consider drafting your layout on paper or using digital design tools to visualize the final result. This is the most important step how to install hexagon lights, be sure to count the number of panels you have to avoid overstretching your design.
Once your design is ready, the next step is to prepare the installation surface. The area should be clean, dry, and smooth to enhance the adhesive strength of the mounting pads. Clean the surface with a dry cloth, and for stubborn greasy spots, a gentle cleaning solution is helpful.
Installation Process: Panel Connection, Control Unit Attachment, and Mounting
With your design plan in place and the surface prepared, you can proceed to connect your hexagon panels. Connectors typically slide into slots on each side of the hexagon panel and attach to the next panel. Follow your layout plan during this phase to ensure accuracy in your design.
The control unit, acting as both the primary power source and the command center for your hexagon lights, is subsequently linked to one of the panels using a distinct connector. Ensure to situate this control unit in a spot where you can readily access its controls.
The final step of how to install hexagon lights, mount the assembled panels on the surface using adhesive pads or strips. Ensure each panel adheres firmly to the surface by applying some pressure.
Post-Installation: Testing and Adjustments
Once your hexagon lights are mounted, it’s time to test them. Plug the control unit into a power source and turn on the lights. Explore the settings, adjusting brightness levels and color patterns to confirm everything works as expected. If necessary, make adjustments to align with your preferred lighting aesthetics.
Wrapping Up
Hexagon lights offer a superb blend of technological sophistication and style for any space. While the process of installing hexagon lights may initially appear complicated, it becomes quite achievable once you grasp the essentials – understanding the tools required, preparing before installation, and knowing what to do post-installation.
In the event of encountering any difficulties or uncertainties, seeking assistance from a professional is always a wise decision. Installing hexagon lights should be an exciting journey toward achieving your perfect ambiance. Now, with these guidelines at your fingertips, you have knew how to install hexagon lights, you’re ready to install your hexagon lights and transform your space.
$99.00 Original price was: $99.00.$79.00Current price is: $79.00.
$199.00 Original price was: $199.00.$99.00Current price is: $99.00.
$1,299.00 Original price was: $1,299.00.$1,189.00Current price is: $1,189.00.
$299.00 Original price was: $299.00.$279.00Current price is: $279.00.
$299.00 Original price was: $299.00.$279.00Current price is: $279.00.
$299.00 Original price was: $299.00.$259.00Current price is: $259.00.
$499.00 Original price was: $499.00.$399.00Current price is: $399.00.
$299.00 Original price was: $299.00.$189.00Current price is: $189.00.
$299.00 Original price was: $299.00.$259.00Current price is: $259.00.
$199.00 Original price was: $199.00.$119.00Current price is: $119.00.
$699.00 Original price was: $699.00.$239.00Current price is: $239.00.
$699.00 Original price was: $699.00.$389.00Current price is: $389.00.